Menu 10.5.57 - Packet Desk Controls
In The Collector System, you can set the controls for automatically moving packets to higher-balance desks when additional accounts raise the packet total.
This function changes the desk of the primary packet member, all members of the packet that are on the same desk as the primary, and any packet members that are new to the packet. Any existing packet members that are not on the primary's desk are not included in the packet total and are not moved to the new desk.
For example, an account arrives with a balance of $100 and is assigned to the under-$200 desk. Another account is received and is packeted to the first, bringing the total to $240. The account now belongs on a higher-balance desk. This routine governs that transfer.
In determining dollar amounts, if assigned amounts were specified for the account categories, the balance is used in place of the assigned amount if the balance is less than or equal to zero or if the account has been canceled.
We recommend setting up your packet desk controls on paper before implementing this feature. Determine the following for your agency:
Know your desk levels by dollar amount as set up in Automatic Desk Assignment Setup. For more information, see Menu 6.24 - Desk Movement.
Know which figures (principal, interest, court, or others) the desk assignments are based on.
Decide where each desk's accounts will go when they move to a higher-balance desk. This includes jumps of more than one level. For example, level 1 to level 2, level 2 to 3 and so on, and also level 1 to levels 3 and 4, level 2 to 4, and so on. You can create up to nine levels in The Collector System.
To use this routine, the Assign Desk to Primary field in the Matching report setup routines must be set to Y.
To configure packet desk controls:
-
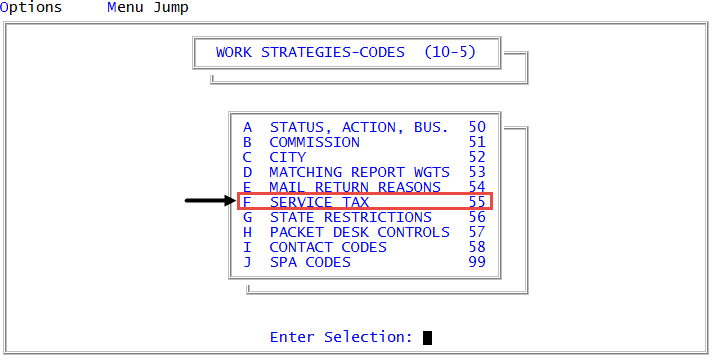
From the Master menu, navigate to
 Management Strategy > Codes > Packet Desk Controls (menu 10.5.57).
 - In the Automatic Desk Assignment Criteria Input window, select Update Packet Desk Controls, and press Enter or click Ok.
-
In the Dollar Code (?) field of the Packet Desk Controls screen, type ? to select the dollar categories.
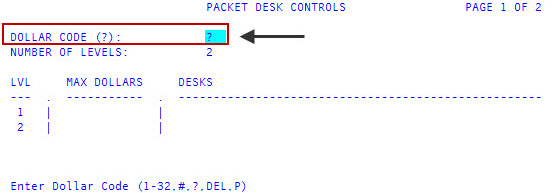
- In the Dollar Categories window, select either AccountBalance or Account Owing, and then press Enter, or click Ok.
-
In the Dollar Fields window, select all the dollar categories to be evaluated, and press Enter or click Ok.
To select a field, click an unhighlighted option. To deselect an option, click a highlighted option.
For example, if desk assignments are assigned by amount plus interest, select those two from the list, When the screen is filed, the corresponding code and description are entered in the Dollar Code filed. You can also use this field to delete or print desk controls.
-
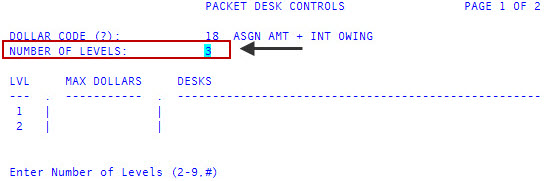
In the Number of Levels in the Packet Desk Controls screen, type the number of levels your desks are divided into by balance, and press Enter.
For example, if your agency has small-balance, medium-balance, and high-balance desks, type 3.
-
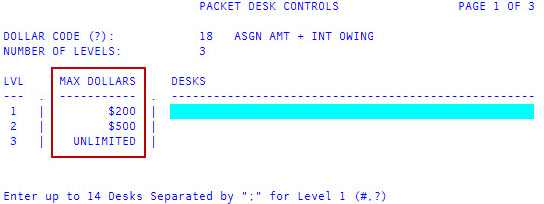
In the Max Dollars fields for each level, type a maximum dollar amount for each level, and press Enter to navigate down each field in the column.
For example, if level 1 desks work accounts of $200 or less, type 200.
On your highest level, Unlimited is entered automatically.
-
In the Desks field, type the desk numbers and desk groups for each level, and press Enter to navigate to the next field.
To select from a list of desks, type ?, and press Enter. In the Available Desks window, select the desks to add, and press Enter or click Ok.
Separate each number with a semicolon.
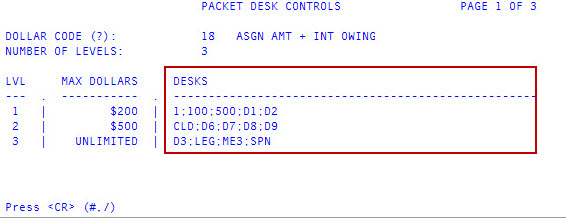
- After you have entered all the desk numbers for each level, press Enter.
-
Packet Desk Controls screen displays. For each desk listed in the Lv1 Dsk column, enter the desk location to move packets from level 1 desks to level 2 desks in the Level 1 to 2 column. Press Enter to move to the next field.
Accounts always go from a desk, but you can send them to an assignment group. To send accounts to assignment group instead of a desk, type the group instead of a desk number.
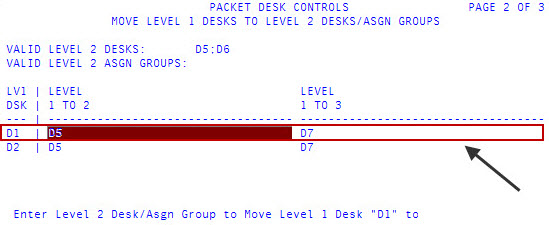
- In the Level 1 to 3 field, enter the desk location to move packets from level 1 desks to level 3 desks for each desk listed in the Lv1 Dsk column. Press Enter to move to the next field.
- Repeat Steps 10-12 for each desk level screen that displays for each possible transfer between levels: level 1 to all higher levels, level 2 to all higher level, and so on.
After you finish entering the information for all the levels, and press Enter to return to the Automatic Desk Assignment Criteria Input window, all of your changes are made. The system does not display a confirmation message.