Reviewing precollect accounts prior to a transfer
Use this option to generate a list of precollect accounts to review before actually transferring them to trust. Though this option uses the same criteria used to transfer account, it does not actually transfer the accounts.
The placement date is the date the precollect account was added to the system. Entering the starting and ending placement date ranges are optional. If you enter only a starting placement date, the report only lists those precollect accounts with a placement date equal to or after the date you enter here. If you enter an ending placement date, only those accounts with a placement date prior to the one you enter here are listed.
To review precollect accounts prior to transfer:
-
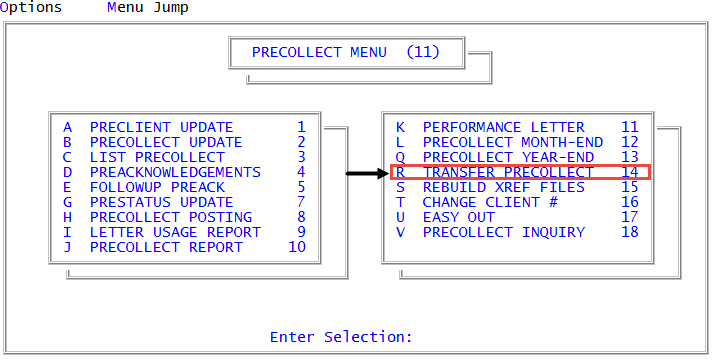
From the Master menu, navigate to
 Precollect > Transfer Precollect (menu 11.14).
 - In the Transfer Precollect Account to Trust window, select Review Prior to Transfer, and press Enter or click Ok.
-
At the Send information to printer? prompt, do one of the following:
To print the list, select Yes.
To view the list on the screen, select No.
- In the Precollect Transfer Review List window, select whether to sort the list by account number or name, and press Enter or click Ok.
- In the Enter Preclient Number(s) Separated by a Semicolon window, do one of the following:
- Type the preclient account numbers, separating each with a semicolon, and press Enter or click Ok.
- To include all accounts, press Enter or click Ok.
- To use a Get-List or Select statement, type the statement, and press Enter or click Ok. For more information, see Working with Recall.
- In the Enter Starting Placement Date window, do one of the following:
- To specify a starting placement date for which to include precollect accounts in the list, type the date using the MM-DD-YY format, and press Enter or click Ok.
- To not specify a starting date, press Enter or click Ok.
- In the Enter Ending Placement Date window, do one of the following:
- To specify an ending placement date for which to include precollect accounts in the list, type the date using the MM-DD-YY format, and press Enter or click Ok.
- To not specify an ending date, press Enter or click Ok.
- In the Enter Placement Date window, type the date to display in the Assigned field on the Account Update screen, and press Enter or click Ok.
The following is an example of the Transfer Listing:
![]()
The following table provides a description of the columns in the listing:
|
Column |
Description |
|
Precollect |
The precollect number assigned to the account. |
|
Client# |
The client number. |
|
Name |
The name of the customer. |
|
Dt-Placed |
The date that will display in the Assigned field in the Account Update screen. |
|
Agn/Amt |
The amount to be collected from the account. |
|
Balance |
The balance for the account. |
|
Sts |
The status of the account. |