Creating Account record notes or cross-referenced notes
Use this feature to create a new note for the Account record or cross-reference information.
To create Account record notes:
- From the Master menu, navigate to Data Entry > Account Update (menu 1.1).
- If the Batch Number to Update window displays, select one of the following, and press Enter or click Ok:
- Use Existing Batch
- New Batch Number
- Last Batch Number
Go to Account Prompt
For more information, see Selecting batch options.
-
At the Enter Account # prompt, type the account number, and press Enter.
You may see an alert that a record is locked. This indicates that another user has the account open. The system displays a prompt with the user's initials. For a full list of the commands available at this prompt, see Working the Account# prompt options.
-
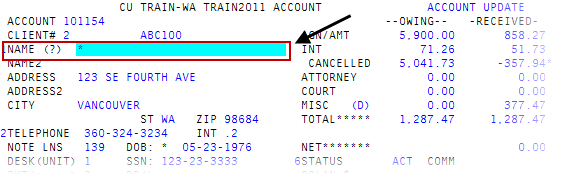
In the Name field of the Account Update screen,
 type *, and press Enter.
For a list of the commands available in this field, see Using Name prompt options.
- If you are not already at the last page of notes, at the Enter line number prompt, type B, and press Enter.
- At the Enter line number prompt, press Enter.
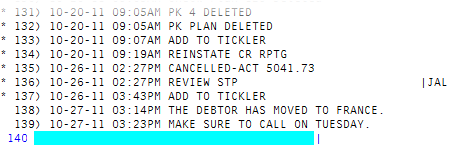
At the Enter Option prompt, to add a note, type A, and press Enter.
The note line is highlighted and the cursor displays at the beginning of the note.
- In the new line, do one of the following, and press Enter:
- To create a note, type the note information.
To create a cross-referenced note, do one of the following before the text of the note:
Name cross-referenceType XF, followed by the name in "last name, first name" format. You can enter the format in one of the following ways:
XF: "last name, first name"
XF- "last name, first name"
XF "last name, first name"
Address cross-referenceType XA, followed by the address. You can enter the address in one of the following ways:
XA: "address"
XA- "address"
XA "address"
Social security number cross-referenceType XS, followed by the social security number. You can enter the social security number in one of the following ways:
XS: "social security number"
XS- "social security number"
XS "social security number"
Data reference line cross-referenceType XD, followed by the data reference line number. You can enter the data reference line number in one of the following ways:
XD: "data reference line number"
XD- "data reference line number"
XD "data reference line number"
Client reference number cross-referenceType XR, followed by the client reference number. You can enter the client reference number in one of the following ways:
XR: "client reference number"
XR- "client reference number"
XR "client reference number"
- In the next note line, do one of the following:
- To create another new note, repeat Step 6.
- To exit, press Enter.