Creating a statement free-form message
This procedure describes how to enter a free-form message to print on each client's statements. A different message can be used for each statement format. There is no limit to the length of the message.
If your statements print on blank paper, the message can print right below the client address information, at the bottom of the last page, or above the first transaction line. If your statements print on pre-printed paper, the message can only print above the first transaction line.
You use this same procedure whether you are working with a default or custom statement.
To create a statement free-form message:
-
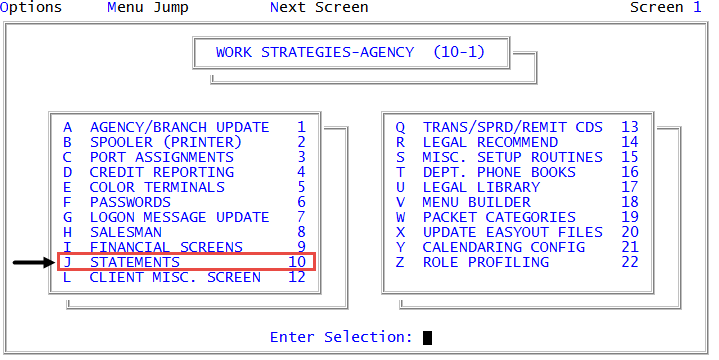
From the Master menu, navigate to
 Management Strategy > Agency > Statements (menu 10.1.10).
 - In the Statement Control Setup window, do one of the following:
- To add a free-form message to the default statement format, select Default Statement Format, and press Enter or click Ok. Proceed to Step 5.
- To add a free-form message to a custom statement format, select Additional Statement Formats, and press Enter or click Ok.
- When you select Additional Statement Formats, in Enter Statement Format # to Update, type the statement ID or type ? to select from a list, and press Enter or click Ok.
- In Enter Format Description, the current description displays, press Enter or click Ok.
-
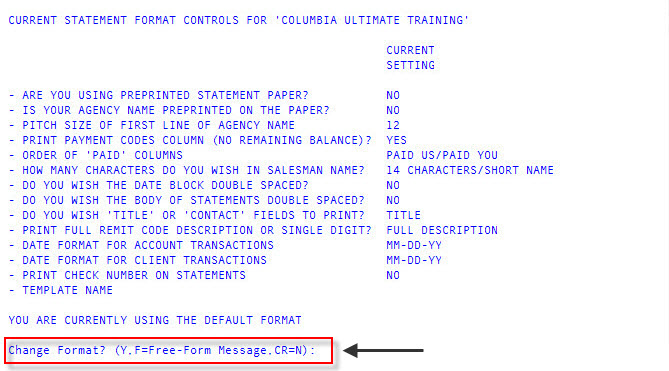
In the Current Statement Format Controls screen, at the Change Format? prompt, type F, and press Enter.
- In the Statement Free-Form Message Type window, select where you want the message to print on the statement. Options are:
- To place text immediately below the client address, select Below the client address (long line), and press Enter or click Ok. The message can be a full line of text. Do not use this option when using pre-printed paper.
- To place text at the bottom of the final page of the statement, select Bottom of the last page (long line), and press Enter or click Ok. The message can be a full line of text. Do not use this option when using pre-printed paper.
- To place the text above the first transaction, select Above the first transaction line (short line), and press Enter or click Ok. The message can be up to 26 characters long. When you select this option the existing messages display in the upper left corner of the screen.
- To place the text above the first transaction, select Above the first transaction line (long line), and press Enter or click Ok. The message can be up to 65 characters long. Do not use this option with pre-printed paper. When you select this option the existing messages display in the upper left corner of the screen.
- In Statement Free Format Message, select one of the following, and press Enter or click Ok:
- Add to add a new message. In Enter New Message Line, type a message, and press Enter or click Ok. The Enter New Message Line window displays again; continue adding messages as necessary. When finished, click Cancel.
- Change to update a message.
- In Enter Message Line to Change, type the line number of the message to change, and press Enter or click Ok.
- In Change Message Line, change the message, and press Enter or click Ok.
- Delete to delete a message. In Enter Message Line to Change, accept the default, ALL, or type the line number of the message to delete, and press Enter or click Ok. The Enter Message Line to Change window displays again; continue deleting messages as necessary. When finished, click Cancel.
- In the Statement Free Format Message window, click Cancel.
- At the Save Free-Format Message? prompt select one of the following:
- To save your changes, click Yes.
- To exit without saving, click No.
- To return to the Statement Free Format Message window, click Cancel.