Generating precollect letter/notice samples
Use this option to generate pre-collect letter/notice samples for an account.
To generate multiple pre-collect letter/notice samples:
-
In the Master menu, navigate to
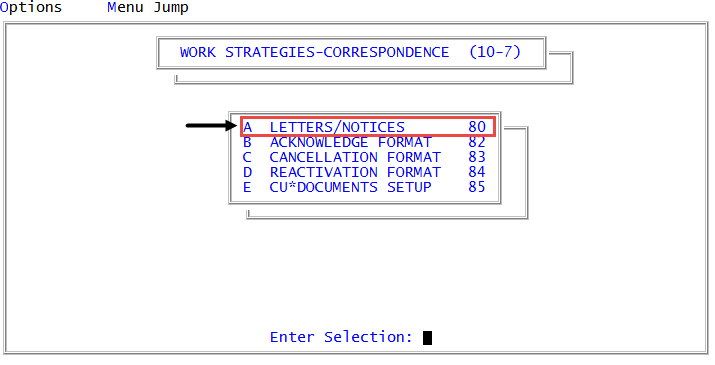
 Management Strategy > Correspondence > Letters/Notices (menu 10.7.80).
 - In the Letters/Notices Setup window, select Generate Samples, and press Enter or click Ok.
- In the Request/Generate Sample Letters window, select Precollect Letters, and press Enter or click Ok.
- In the Enter Account Number window, type the account number, and press Enter or click Ok.
- In the Enter Letter Name window, type the name of the letter/notice, and press Enter or click Ok.
- In the Enter Time to Print Letters window, do one of the following, and press Enter or click Ok.
- To print the letters/notices now, type Now.
- To print the letters/notices at a specific time, type the time in 24-hour format. For example, type 22:30 to print at 10:30 p.m.
- At the Letters will start printing time. Print all forms in unattended mode? prompt, do one of the following:
- To print all forms in unattended mode, click Yes.
- To not print all forms in unattended mode, click No. Proceed to Step 11.
- At the Send all forms to hold files? prompt, do one of the following:
- To send all forms to hold files, click Yes.
- To send the files directly to the printer, click No.
- To go back to the previous screen, click Cancel.
- In the Enter Date to Print on Letters window, type a date to print on the letter/notice, and press Enter or click Ok.
- At the Date: X will appear exactly as shown, unless agency date formatting occurs. Continue? prompt, do one of the following:
- To continue, click Yes.
- To go back to the previous window, click No.
- In the Select Printer to Use window, select a printer, and press Enter or click Ok.
- In the Enter Date to Print on Letters window, type a date, and press Enter or click Ok.
-
In the Date: X will appear exactly as shown, unless agency date formatting occurs. Continue? prompt, do one of the following:
- To continue, click Yes.
- To go back to the previous window, click No.
- At the OK to print? prompt, to print click OK.
The correspondence prints.