Generating sample trust letters/notices for alternate addresses
You can generate and send sample trust letters/notices to alternate addresses.
To generate sample trust letters/notices for alternate addresses:
-
In the Master menu, navigate to
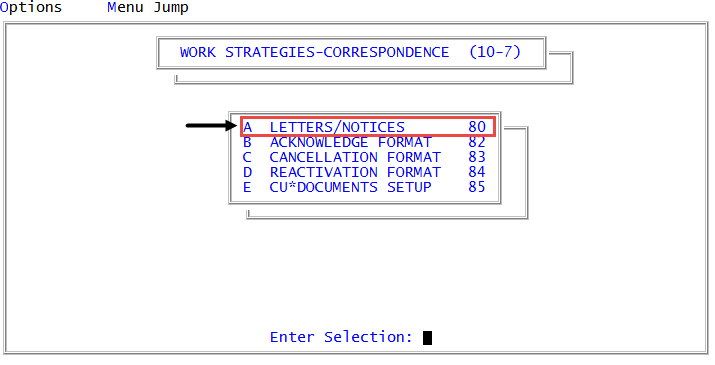
 Management Strategy > Correspondence > Letters/Notices (menu 10.7.80).
 - In the Letters/Notices Setup window, select Generate Samples and then press Enter or click Ok.
- In the Request/Generate Sample Letters window, select Trust Letters, and press Enter or click Ok.
- In the Enter Account Number window, do one of the following, and press Enter or click Ok.
- To generate a single trust letter/notice, type an account number.
- To generate multiple trust letters/notices, type X followed by the account number. For example, type X2967.
- If a notice is currently in effect for the account, in the Request Or Cancel Letters To Individual Accounts screen, at the Notice Series X in effect. Cancel? prompt, do one of the following:
- To cancel the notice series, click Yes.
- To not cancel the notice series, click No.
- In the Letter/Document/Letter Set (AA,IA,?a) window, type AA.
- At the Enter Letter / Document / Letter Set (?a) prompt, do one of the following, and press Enter or click Ok.
- Type the name of the letter/notice, document, or letter/notice set.
- To see a list of letters/notices, documents, or letter/notice sets, type ?.
- In the Valid Letter by Category window, select a letter/notice, and press Enter or click Ok. The letter/notice is requested.
- In the Alternate Name (/AP,/EMP,/EMP2,?) window, do one of the following, and press Enter or click Ok.
- To send the correspondence to a specific individual, type their name.
- To see a list of options, type ?.
- To use the alternate payer name, type /AP.
- To use the employer name, type /EMP.
- To use the second employer name, type /EMP2.
-
In the Alternate Name window, verify the information is correct or type a new name, and press Enter or click Ok.
If you type a new alternate name or any new information in the following fields, the Fiscal file is not updated with the information. The information you type is only used for the correspondence.
- In the Alternate Name2 window, do one of the following, and press Enter or click Ok.
- Verify the name is correct.
- Type a new name.
- In the Alternate Address window, do one of the following, and press Enter or click Ok.
- Verify the address is correct.
- Type a new address.
- In the Alternate Address2 window, do one of the following, and press Enter or click Ok.
- Verify the address is correct.
- Type a new address.
- In the Alternate City window, do one of the following, and press Enter or click Ok.
- Verify the city is correct.
- Type a new city.
- In the Alternate St window, do one of the following, and press Enter or click Ok.
- Verify the state is correct.
- Type a new state.
- In the Alternate Zip window, do one of the following, and press Enter or click Ok.
- Verify the zip code is correct.
- Type a new zip code.
-
In the Number of Copies window, type the number of copies to request, and press Enter or click Ok.
The letter/notice prints.
- Do one of the following:
- If you are generating a single trust letter/notice, in the Enter Account Number window, click Cancel.
- If you are generating multiple trust letters/notices, in the Letter/Document/Letter Set (AA, IA, ?a) window, do one of the following:
- To generate additional letters/notices, return to Step 6.
- To not generate additional letters/notices, press Enter or click Ok. In the Enter Account Number window, click Cancel. Proceed to Step 18.
- In the Enter Time to Print Letters window, do one of the following, and press Enter or click Ok.
- To print the letters/notices now, type Now.
- To print the letters/notices at a specific time, type the time in 24-hour format. For example, type 22:30 to print at 10:30 p.m.
-
At the Letters will start printing time. Print all forms in unattended mode? prompt, do one of the following:
Print all forms in unattended mode
- Click Yes.
- At the Send all forms to hold files? prompt, to send all forms to hold files, click Yes; otherwise, click No.
- You can click Cancel to go back to the previous screen.
- In the Enter Date to Print on Letters window, type the date to print on the letter/notice, and press Enter or click Ok.
- At the Date: X will appear exactly as shown, unless agency date formatting occurs. Continue? prompt, to continue click Yes; otherwise, to go back to the previous window, click No.
Not print all forms in unattended mode
- Click No.
- In the Select Printer to Use window, select a printer, and press Enter or click Ok.
- In the Enter Date to Print on Letters window, type the date to print on the letter/notice, and press Enter or click Ok.
- In the Date: X will appear exactly as shown, unless agency date formatting occurs. Continue? prompt, click Yes to continue; otherwise, to go back to the previous window, click No.
- At the OK to print? prompt, to print click OK.
The correspondence prints.