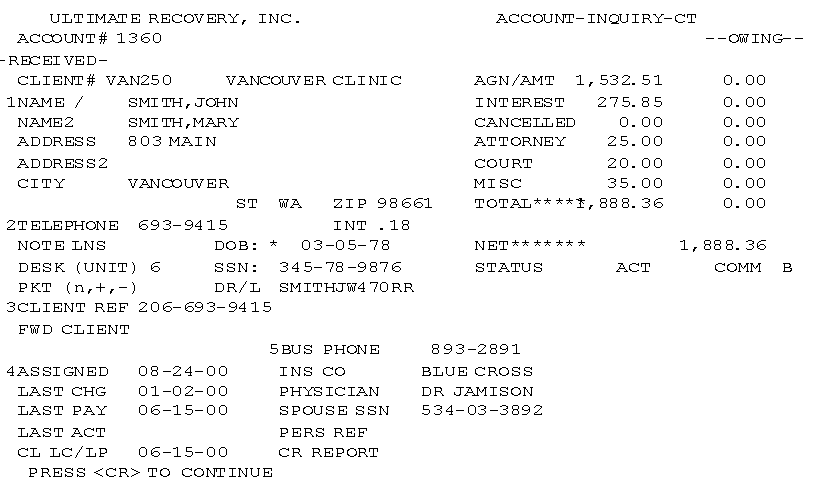
Displaying test data using the Account Inquiry screen
Use this option to determine if test data is being correctly loaded into test accounts. Check each field to see that the appropriate information has been entered. For example, an address should not be in the Telephone field.
A Client record and Control Record are created as a part of this routine. Update the client record as soon as possible to show the client's name, pertinent client information (such as the remit code, interest, and so on) and a customized client Control Record.
The following information could display in the client field: "CLIENT# * CLIENT NOT ON FILE." If this prompt displays, a client record has not been established for this client.
To display test loading using the Account Inquiry screen:
-
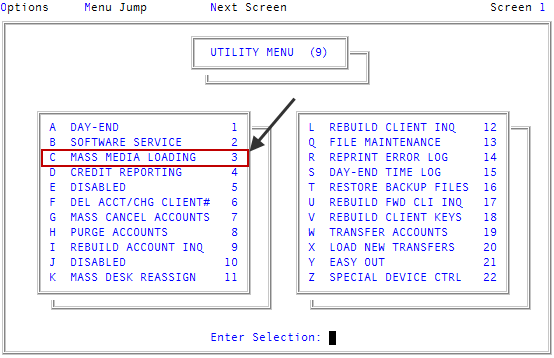
From the Master menu, navigate to
 Utility > Mass Media Loading (menu 9.3).
 - In the Mass Media Loading window, select Display Test - Account Inquiry, and press Enter or click Ok.
- In the Enter ID Number window, to view an account, do one of the following, and press Enter or click Ok:
- For new accounts, type the sequential ID number relative to the position of the record in the import file. For example, 1, 2, 3, and so on.
- For updates to existing accounts, type the account number followed by U. For example, 123456U.
-
In the Account Inquiry screen, check each field to ensure that the data loaded properly. At the To Continue, Press <CR> (*=Notes F=Fiscal A=Agn/Amt M=Misc Amt) prompt, do one of the following:
For updates to existing accounts, the Account Inquiry screen only displays data in updated fields.
- To see the notes in the account, type *.
- To see the Fiscal fields, type F. Proceed to Step 6.
- To see the assigned amount, type A. Proceed to Step 7.
- To see the miscellaneous amounts, type M. Proceed to Step 8.
- To exit, press Enter. Proceed to Step 9.
- In the notes screen, do one of the following:
- To go to the next page of notes, press Enter.
- To go to the Account Inquiry screen, type Q, and press Enter. Repeat Step 4.
- At the Enter Screen # (CR=1, /) prompt, do one of the following:
- To view a screen, type a screen number, and press Enter.
- To go back to the Account Inquiry screen, type /. Repeat Step 4.
- In the Assigned Amounts window, do one of the following, and press Enter.
- To view the next page, press Enter.
- To view the previous page, type /.
- To go back to the Account Inquiry screen, type Q. Repeat Step 4.
- In the Miscellaneous Amounts window, do one of the following, and press Enter.
- To view the next page, press Enter.
- To view the previous page, type /.
- To go back to the Account Inquiry screen, type Q. Repeat Step 4.
- In the Enter ID Number window, to exit, click Cancel.