Adding accounts to payment plans
If an account is added to a packet on an existing payment plan, you can also add it to a payment plan. When the Payment Plan Setup screen displays for the new account, the system automatically enters the information from the existing payment plan. You can either use the same payment terms, due dates, and so on, for the new account, or you can update the fields to create new payment terms specific to this account.
If the account you add is part of a packet, The Collector System automatically skips any packet members that meet the following conditions:
- The account has been canceled.
- The account balance has been paid.
- The account has a credit balance.
- The account is already on a future transaction plan.
To add an account to a payment plan:
-
Do one of the following:
 From the Collector screen
- Open an account in the Collector screen.
- At the CMD prompt, type H, and press Enter.
From the Account Update screen
-
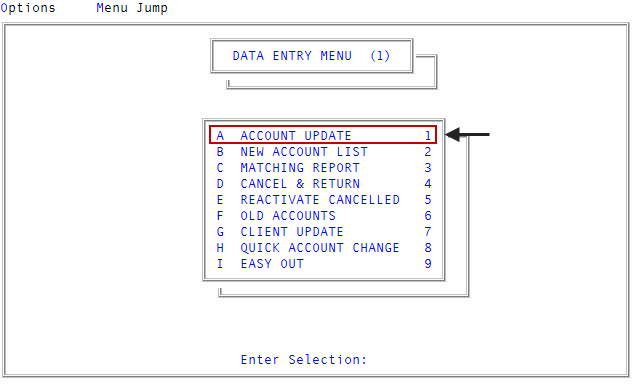
From the Main menu, select Data Entry > Account Update menu 1.1).
-
If the Batch Number to Update window displays, select one of the following, and press Enter or click Ok:
- Use Existing Batch
- New Batch Number
- Last Batch Number
- Go to Account Prompt
For more information, see Selecting batch options.
-
At the Enter Account # prompt, type the account number, and press Enter.
You may see an alert that a record is locked. This indicates that another user has the account open. The system displays a prompt with the user's initials. For a full list of the commands available at this prompt, see Menu 1.1 - Account Update.
- In the Name field, type #, and press Enter.
- At the OK to File? prompt, type PP, and press Enter.
- At the Enter Plan # prompt, type the payment plan number to add this account to, and press Enter.
- In the Payment Plan Setup screen, do one of the following:
- To use the information from the existing payment plan and allow the system to compute the additional time needed to pay off the account, in the Payment Amount field, type the amount, and press Enter.
- To change the accessible fields, see Steps 6-16 of Creating a payment plan.
- To save your changes, in any field type #, and press Enter.
-
At the OK to File? prompt, do one of the following:
- To save your changes, press Enter.
- To discard your changes, type N, and press Enter.
- At the Change, Delete, Add, or Quit Unchanged? prompt, type Q, and press Enter.
- To continue making changes to the Payment Plan Setup screen, type /, and press Enter.
The system displays a message the plan is saved.