Assigning, changing, or removing printer access profiles for users
After you finish configuring printer access profiles, assign one to each user, as necessary. In the system, printer access profiles become associated with a user login, determining which printers the user can access. When the user views their printer list, only those printers you have given them access to display in the list. If you choose not to assign a printer access profile to a user, they continue to have access to all available printers.
You must create printer access profiles before you assign them to a user. For more information, see Creating or changing printer access profiles.
To assign a printer access profile to a user:
- From the Master menu, navigate to Management Strategy > Agency> Passwords (menu 10.1.6).
- In the Enter Master Password window, type the master password, and press Enter or click Ok.
-
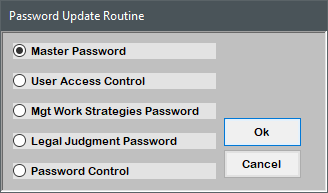
In the Password Update Routine window, select User Access Control, and press Enter or click Ok.
-
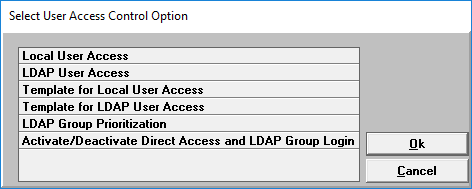
In the Select User Access Control Option window, select Local User Access, and press Enter or click Ok.
- In the Enter User Login window, do one of the following, and press Enter or click Ok:
- If you know the user login, type it.
To choose from a list of user logins, type ?.
A list of all the user logins displays.
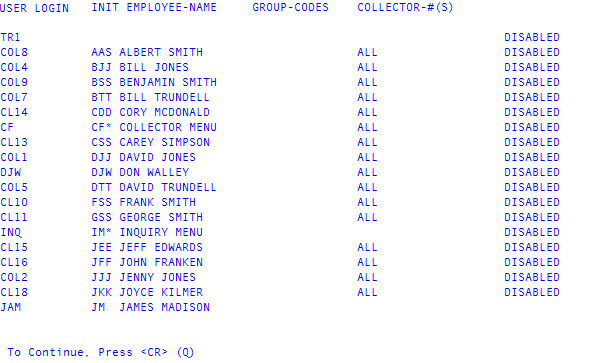
- Press Enter to scroll through the pages of user logins and names until you find the one you are looking for.
- To exit the user login list, type Q, and press Enter.
-
From the User Login screen, type U2, and press Enter.
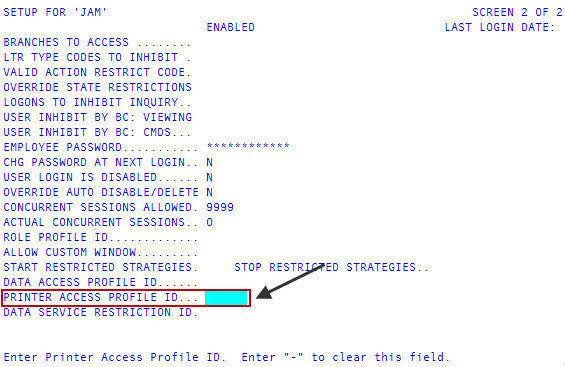
- In the Printer Access Profile ID field, do one of the following, and press Enter:
- To add a profile, type the printer access profile ID to attach to this user.
- To remove a printer access profile for this user, press the Spacebar.
- To exit the screen, type # in any field, and press Enter.
-
In the Setup for user login () Master Menu window, click Cancel.
Even though the system does not display a confirmation message, the printer access profile is assigned to the user login.