Configuring forward controls
Use forwarding controls to establish a forward desk, set up the next work date, and determine the forward agencies to use in certain locations.
We recommend you create a forward desk before you update the forward controls. For detailed information and step-by-step instructions see Creating or changing collector or support desks.
To configure or update forward controls:
-
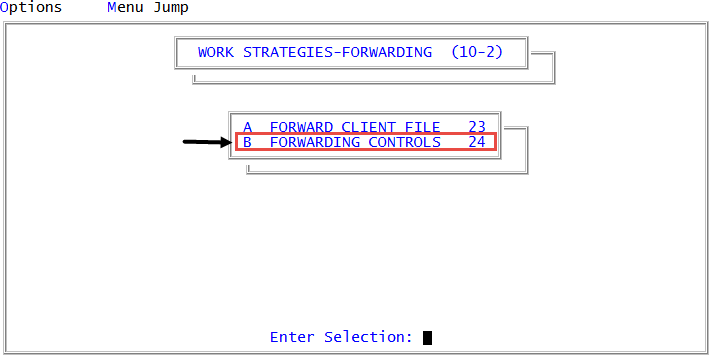
From the Master menu, navigate to
 Management Strategy > Forwarding > Forwarding Controls (menu 10.2.24).
 - In the Forwarding Controls window, select Update Controls, and press Enter or click Ok.
-
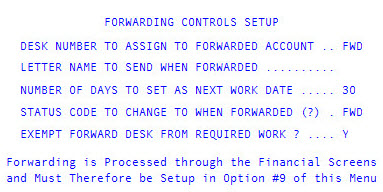
In the Desk Number to Assign to Forwarded Account field of the Forwarding Controls Setup screen, type the forward desk number and click Ok.
The desk must be set up in the Collector File Setup routine. Forward desks are automatically excluded from desk reassignment.
- If you are updating the forward desk number, at the Include Desk #old desk name in Desk Reassignments? prompt, do one of the following:
- To include the previous forward desk in desk reassignments, click Yes.
- To exclude the previous forward desk from desk reassignments, click No.
-
In the Letter Number to Send When Forwarded field, type the ID of the letter text to send t to the forward client with the forwarded accounts, and press Enter.
The "letter" can be a single forward letter or a multi-page document with the first page set up as a forward letter. For more information on creating correspondence, see Menu 10.7.80 - Letters/Notices.
-
In the Number of Days to Set as Next Work Date field, type the number of days to pass before working a forwarded account again, and press Enter.
Generally this is used as a reminder to check for an acknowledgment. After the specified number of days passes, the account will display either on the forward desk's WIP or, if a forward desk is not used, on a collector's WIP.
- In the Status Code to Change to When Forwarded (?) field, type the status code to assign to each account when it is forwarded, and press Enter.
- In the Exempt Forward Desk from Required Work? field, type Y to exclude forwarded accounts from required work, and press Enter.
- At the OK to File? prompt, do one of the following, and press Enter or click Ok:
- To save the controls, type Y.
- To exit the screen without saving, type N.
- To make changes to the screen, type /.