Creating or changing terminal color schemes
Using and changing color schemes only works on "dumb" terminals, which are computers that are limited to text-only capabilities. If you use CU·Emulate, see your CU·Emulate manual to change screen colors.
To create or change a terminal color scheme:
-
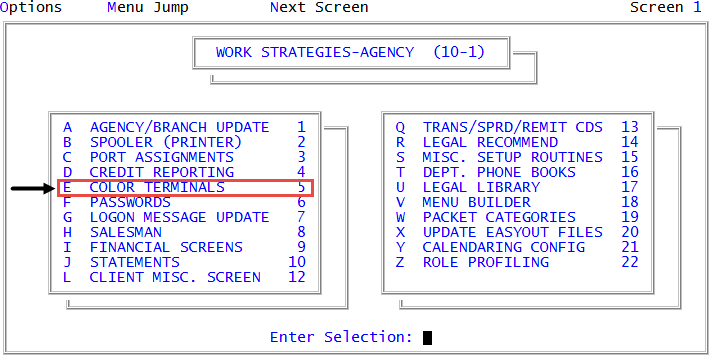
From the Master menu, navigate to
 Management Strategy > Agency > Color Terminals (menu 10.1.5).
 - In the Enter Port to Change window, type the port number to change, and press Enter or click Ok.
- In the Color Terminal Options window, select Create New Color Scheme, and press Enter or click Ok.
-
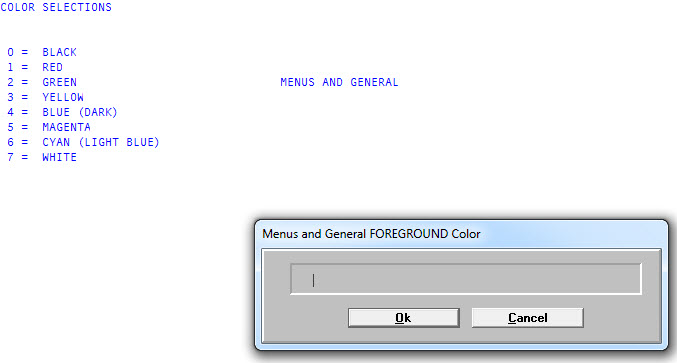
In the Menus and General Foreground Color window, type the number of the color you want to use for the foreground from the Color Selections screen. Press Enter or click Ok.
- In the Menus and General Background Color window, type the number of the color to use for the background from the Color Selections screen, and then press Enter or click Ok.
- At the Blink? prompt, to enable the color to blink, click Yes.
- At the Underscore? prompt, to enable the fields to be underscored, click Yes.
- In the Highlighted Data Foreground Color window, type the number of the color to use to highlight information in the foreground from the Color Selections screen, and press Enter or click Ok.
- In the Highlighted Data Background Color window, type the number of the color to use to highlight information in the background from the Color Selections screen, and press Enter or click Ok.
- At the Blink? prompt, to enable the color to blink, click Yes.
- At the Underscore? prompt, click Yes.
- In the Prompts and Other Data Foreground Color window, type the number of the color to use in the foreground from the Color Selections screen, and press Enter or click Ok.
- In the Prompts and Other Data Background Color window, type the number of the color to use in the background from the Color Selections screen, and press Enter or click Ok.
- At the Blink? prompt, to enable the color to blink, click Yes.
- At the Underscore? prompt, click Yes to enable the fields to be underscored, and then press Enter or click Ok.
- In the Collector Work Areas Foreground Color window, type the number of the color to use in the foreground from the Color Selections screen, and press Enter or click Ok.
- In the Collector Work Areas Background Color window, type the number of the color to use in the background from the Color Selections screen, and press Enter or click Ok.
- At the Blink? prompt, to enable the color to blink, click Yes.
- At the Underscore? prompt, to enable the fields to be underlined, click Yes.
-
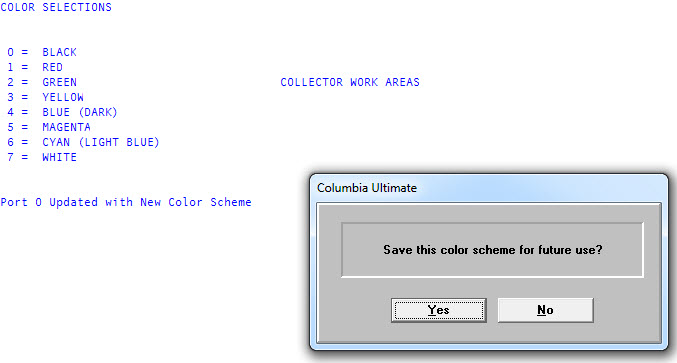
The system confirms that the port's color scheme has been updated with the new color scheme. At the Save this color scheme for future use? prompt, click Yes to save it with the other color schemes.
The color scheme you just entered now works on the port number you entered at the start of this routine. It continues (even if you log off) until it is changed using this routine.
If you are just experimenting, you may not want to save this color scheme with the others.
- If you save the color scheme, do one of the following:
- If you are creating a new color scheme, at the Enter a Number to Reference the Color Scheme By window, type a number between 1 and 200, and then press Enter or click Ok.
- If you are updating an existing color scheme, type the reference number of the color scheme to change, and then press Enter or click Ok. At the Color Scheme Number and Name already in use. Replace it? prompt, click Yes to save the changes. If you are unsure of the scheme number and name, you can view a list of all the available schemes. For more information, see Viewing a list of available color schemes.
-
Type a short description for the color scheme, and press Enter or click Ok.
A confirmation message displays that the color scheme has been saved.