Send letters/notices to international addresses
You can send a letter/notice to an international address by using this option. To mass request or cancel letters/notices, see Request or cancel multiple letters.
For international addresses, address information exists in a multivalue of DEBTOR<3>, specifically with the country name in DEBTOR<3.7>. Also, an international address nulls any data for city, state, and zip (DEBTOR<4, 5, and 6>).
- From the Master menu, navigate to Correspondence > Letters/Notices (menu 2.2).
- In the Letters/Notices window, select Request/Cancel Letters/Notices, and press Enter or click Ok.
- In the Request/Cancel Letters/Notices window, select Request/Cancel Letters, and press Enter or click Ok.
- In the Request/Cancel Letters window, select Individual Letters, and press Enter or click Ok.
- In the Enter Account Number window, type the account number, and press Enter or click Ok.
- If a letter/notice has already been requested, the Letter name already requested. Cancel? prompt displays. If a letter/notice has not been previously requested, proceed to the next step.
- To cancel the letter/notice, click Yes; otherwise, click No.
- In the Letter/Document/Letter Set window, type IA, and press Enter.
- In the Enter Letter / Document / Letter Set window, do one of the following, and press Enter or click Ok:
- If you know the letter/notice name, type it.
- To select from a list of correspondence, type ?.
- In the Valid Letter by Category window, select a letter/notice, and press Enter or click Ok.
- In the Alternate Name window, do one of the following, and press Enter or click Ok.
- If you know the alternate name, type it, or press Enter to accept the current name.
- To use the alternate payer name, type /AP. Proceed to Step 12.
- To use the employer name, type /EMP. Proceed to Step 12.
- To use the second employer's name, type /EMP2. Proceed to Step 12.
- In the Alternate Name2 window, do one of the following, and press Enter or click Ok.
- If you know the Alternate Name2 name, type it. Proceed to Step 14.
- To use the Alternate Payer Name2 name, type /AP.
- To use the Employer Name2 name, type /EMP.
- To use the second Employer Name2 name, type /EMP2.
- In the Alternate Name2 window, do one of the following:
- To accept the name currently displayed, press Enter or click Ok.
- To use a different name, type it, and press Enter or click Ok. Proceed to Step 14.
- In the Alternate Name window, do one of the following, and press Enter or click Ok.
- To accept the alternate name press Enter.
- To use another name, type the alternate name, and press Enter.
- In the Alternate Name2 window, do one of the following:
- To accept the current Alternate Name2 name, press Enter or click Ok.
- To use a different Alternate Name2 name, type it, and press Enter or click Ok.
-
In the International Address screen, on the first line, the name of the recipient displays. On the subsequent lines, type the address, and press Enter.
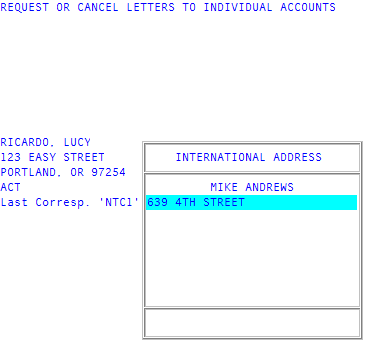
- On the last line of the address, type the country name in English, uppercase letters, and press Enter.
- After you type the country name, type #, and press Enter.
- At the Ok to file prompt, do one of the following, and press Enter:
- To save the address, type Y. Proceed to Step 24.
- To discard the address, type N.
- To retype the address, type DEL. Repeat Steps 14-17.
- To make changes to the address, type /.
- In the Alternate Name2 window, type an alternate name2 name, and press Enter or click Ok.
-
In the Alternate Address window, type an alternate address, and press Enter or click Ok.
This field and the following fields are required.
- In the Alternate Address2 window, type an address, and press Enter or click Ok.
- In the Alternate City window, type an alternate city, and press Enter or click Ok.
- In the Alternate St window, type an alternate state, and press Enter or click Ok.
- In the Alternate Zip window, type an alternate zip code, and press Enter or click Ok.
- If the account status inhibits letters/notices from being sent, the Account status status inhibits notices and letters. Override? prompt displays. Do one of the following:
To override the status, click Yes.
The letter/notice is requested.
To not override the status, click No.
The letter/notice is not requested.