Menu 10.5.53 - Matching Report Weights
When The Collector System runs the Matching report, it matches accounts against one another to find different records that represent the same person. When the matches between two or more records accumulate a minimum score, the system prints the matches on the Matching report. For more information, see Menu 1.3 - Matching report.
You can automatically include matching accounts in new or existing packets. You can establish parameters to exempt certain accounts from packeting.
When information from the account's special fields or the account's phone number is cross referenced, the category this information is cross referenced into determines the weight given for a match. For example, if you place the phone number into the DRL category, then the weight for a phone match is whatever weight is entered in the DRL category.
Select matching weights that reflect the population characteristics of the area from which you draw your assignments. In a large metropolitan area, a name and address match might not necessarily mean it is the same person (example: two John Smiths in the same large apartment complex). A score of 100 effects automatic packeting; therefore, if the minimum score to print is 60, it would be a good idea to give name and address a score of 45 points each. A match in each area would then equal 90 points— enough to be printed on the report, but not enough for automatic packeting.
If you enter a phone number or information from one of the account special fields into a category, adjust the weight accordingly.
To configure account matching scoring weights:
-
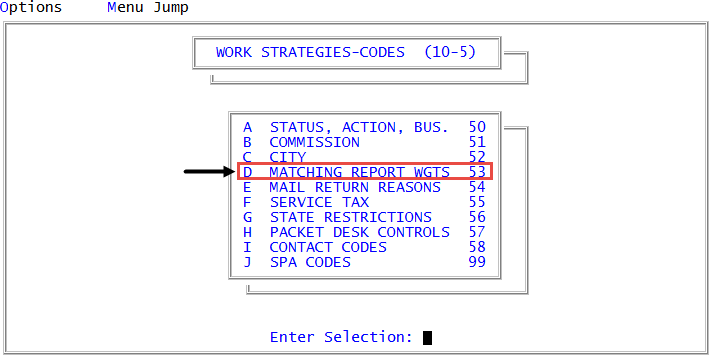
From the Master menu, navigate to
 Management Strategy > Codes > Matching Report Wgts (menu 10.5.53).
 -
In fields 1 through 8 of the Matching Report Setup screen, using the following table, type a number of points (weight) to give to the account each time there is a match in this category, pressing Enter between each field. The maximum weight you can assign to a category is 100 points.
Account Name
Make this score less than the minimum to print as many people have the same name.
If records match on both Name and Name2, or on both Name and Patient, only one name match is counted. This eliminates excessive scores. Cross-referenced names (XF) are included in the items checked. The Patient name is one of those cross-referenced fields.
Last Name Only
20 is a common score for this field.
This category is used only if a full name match was not found on the name and a match in another category (such as address, DRL, SSN, and so on) was found. Simply having the same last name should not constitute a matching criterion, so this category should receive a low score.
Address
Matches are based on the street address and the first three digits of the zip code. Therefore, when a three-digit zip code encompasses more than one city, it is possible for a false match to occur. This could happen if there is a 123 Main St. in Yourtown, WA 98101 and also a 123 Main St. in Hometown, WA 98122. Keep this in mind when assigning points to an address match.
Cross referenced addresses (XA) and mail return addresses (MR-) are checked for a match, but cross-referenced addresses are not checked for ZIP code.
Social Security Number
90 is a common score for this field.
Social security numbers are unique, so give this category a high score.
Date of Birth
This is checked only if there is a successful name match.
Client Reference number
The client's reference number for this account.
Account Reference Line
The account reference line, used for the account's phone number or driver's license number.
Minimum Score to Print
Usually 60 points.
- In the 9) Auto Packet - Dayend field, to automatically packet accounts during Day-End, type Y, and press Enter.
- In the 10) MR- on Address Match field, to automatically change an account's address to MR- (mail return) when it is placed in a packet where the primary packet's address is MR, type Y, and press Enter:
-
In the 11) Status Codes to Exempt field, do one of the following, and press Enter:
Exclude accounts containing certain status codes from automatic packeting
- Type Y.
- In the XMT Codes field, type the status codes to exclude, separating each with a semicolon, and press Enter.
To exclude all status codes beginning with a certain letter, type the letter followed by a right bracket (]). For example, to exclude all status codes starting with L, type L].
The accounts that are excluded are printed on the Matching report, but are not automatically packeted.
Update the list of exempt status codes
- Type U.
- In the XMT Codes field, update the list of status codes to exclude, and press Enter.
To exclude all status codes beginning with a certain letter, type the letter followed by a right bracket (]). For example, to exclude all status codes starting with L, type L].
-
In the Desks to Packet Exempt field, do one of the following, and press Enter:
Exclude certain desks from automatic packeting
- Type Y.
- In the XMT Desks field, type the numbers of the desks to exclude, separating each with a semicolon, and press Enter.
The accounts that are excluded are printed on the Matching report, but are not automatically packeted.
Update the list of exempt desk numbers
- Type U.
- In the XMT Desks field, update the list of desk numbers to exclude, separating each with a semicolon, and press Enter.
If a desk is exempt from packeting, the exemption not only applies to the Matching report, but also to desk reassignments. If accounts in a packet are on an exempt desk, they do not automatically follow the rest of the packet from one desk to another. Additionally, if an account is moved from a house desk, it will not move to the desk of other packet members if the account, or the primary packet member, is assigned to an exempt desk.
- In the Assign Desk to Primary field, to automatically assign a matched new account to the same desk as the primary account, type Y, and press Enter.
- In the XMT Desks field, type the numbers of the desks to exclude from primary account matching, separating each with a semicolon, and press Enter. You can enter up to 100 desk numbers. Accounts are not moved to or from these desks.
Even when this field is set to Y, accounts may not move desks in the following circumstances:
- If existing accounts are also packeted with the new account, only the new account moves to the same desk as the primary account.
- If the primary account is on an exempt desk, the new account is not moved to the primary desk.
If the primary account is on a desk with a WIP flag of X, the new account is not moved to the primary desk. For more information on WIP flags, see Creating or changing collector or support desks.
In order for Packet Desk Controls to work, this field must be set to Y. For more information, see Menu 10.5.57 - Packet Desk Controls.
-
In the Dayend-Match Changed Accts field, to include non-packeted changed accounts in the Matching report, type Y, and press Enter.
An account is considered changed if one of the following has happened:
- One of the cross-references used in Account Inquiry (name, address, social security number, and so on) is changed.
- The account is added using the Old Account option. For more information, see Menu 1.6 - Old Accounts.
- The account was purged and added back from a purge tape.
- In the Print Report While Matching field, do one of the following, and press Enter:
- To print the Matching report at the same time the system is matching accounts, type Y.
To run the matching routine without printing the Matching report, type N.
To run the report later, see Menu 1.3 - Matching report.
-
In the Pkt to Dtrs on Other Branches field, to automatically packet accounts belonging to clients on different branches, type Y, and press Enter.
If you enter N in this field, accounts with a high enough score still print on the Matching report, but they are not automatically packeted.
- In the Print Only Partial Matches field, to include only partial matches on the Matching report and omit accounts that packeted automatically, type Y, and press Enter.
- In the Fiscal Custom Field, set a matching weight to be used with a selected fiscal field.
- Enter a matching weight (01-100)
- Select the fiscal attribute which will use the matching weight. Type ? to see a list of XD-type fiscal attributes.
To use the Fiscal Custom Field, a Fiscal field with a data type of XD (cross-reference data reference line) is needed in order to use the chosen matching weight. For more information on creating a fiscal field, see Menu 10.5.57 - Packet Desk Controls.
- At the OK to File? prompt, do one of the following:
- To save the settings, press Enter.
- To exit the screen without saving the settings, type N, and press Enter.
- To return to the Matching Report Setup screen to make changes, type /, and press Enter.