Configuring ACH processing for a client
The use of this feature requires the purchase of an additional service. Contact your Finvi Support representative for more information or before making any changes to these settings.
To segregate ACH transactions for a particular client, you need to set up a separate merchant account for that client. This allows a client to segregate a large client’s ACH transactions from all the other ACH transactions that are sent to the vendor for processing.
For detailed setup information regarding ACH transactions, see The Posting screen.
To configure ACH processing for a client:
-
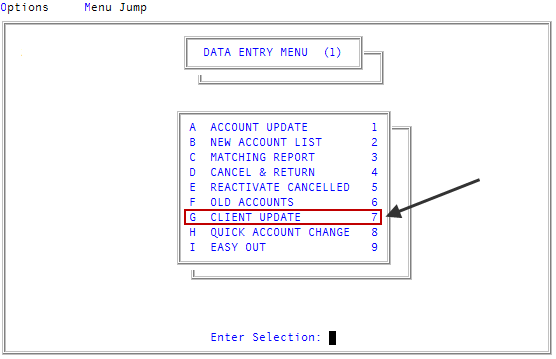
From the Master menu, navigate to
 Data Entry > Client Update (menu 1.7).
You can also access this routine from Management Strategy > Client > Client Update (menu 10.6.60).
-
At the Enter Client # (?, /) prompt, type a client number, and press Enter.
For a list of the commands available in this field, see Using client # prompt options.
-
In the Cli Name field, type /ACH, and press Enter.
In the Cli Name field, if you forget to type / before ACH, a warning message displays asking you to confirm that you want to change the client's name.
Note: For a list of the commands available in this field, see Using client name field options.
- In the Merchant ID (?) field of the ACH Client Set Up, type the
- In the User Name (?) field, type the client username associated with the
- In the Password (?) field, type the client password associated with the
- At the Ok to File? (Y, N, /) prompt, do one of the following, and press Enter:
- To save, type Y.
- To discard the screen without saving, type N.
- To make changes to the screen, type /.